Art Studio#
Computers are integral to the workflows of photographers, cartoonists, videographers, graphics designers, musicians, podcasters, and many other artists. They’re also a primary medium through which art is experienced by patrons. In this chapter, we’ll explore some superpowers related to art and other creative activities. Even if you’re not an artist, you’ll find uses of these powers in your work, home, and hobbies.
Basic image manipulation#
You will often want to crop an image, rotate it, add some text, touch it up slightly, or make significant modifications. Adobe Photoshop has held the crown for professionals in this regard for many years. One high-quality and open-source program that also excels in doing these things is GIMP. We will go through a few basic examples of how to use it here.
OS |
Installation method |
|---|---|
Windows |
|
Linux |
|
macOS |
|
Once you open an image in GIMP, you will find many options, including these useful and basic ones:
Image → Scale Image → Change image size by pixels or percentage
Image → Transform → Rotate → Rotate or flip image
The toolbar on the left has lots of tools for cropping and selecting while the tools on the right deal with layers.
The clone stamp tool#
The clone stamp tool is a wonderful superpower. This tool effectively lets you erase things from images, or duplicate things. You have to try it to believe it.
Here’s a photo of a classic watch. On the left is the original, and on the right is a version that has been clone stamped a lot.
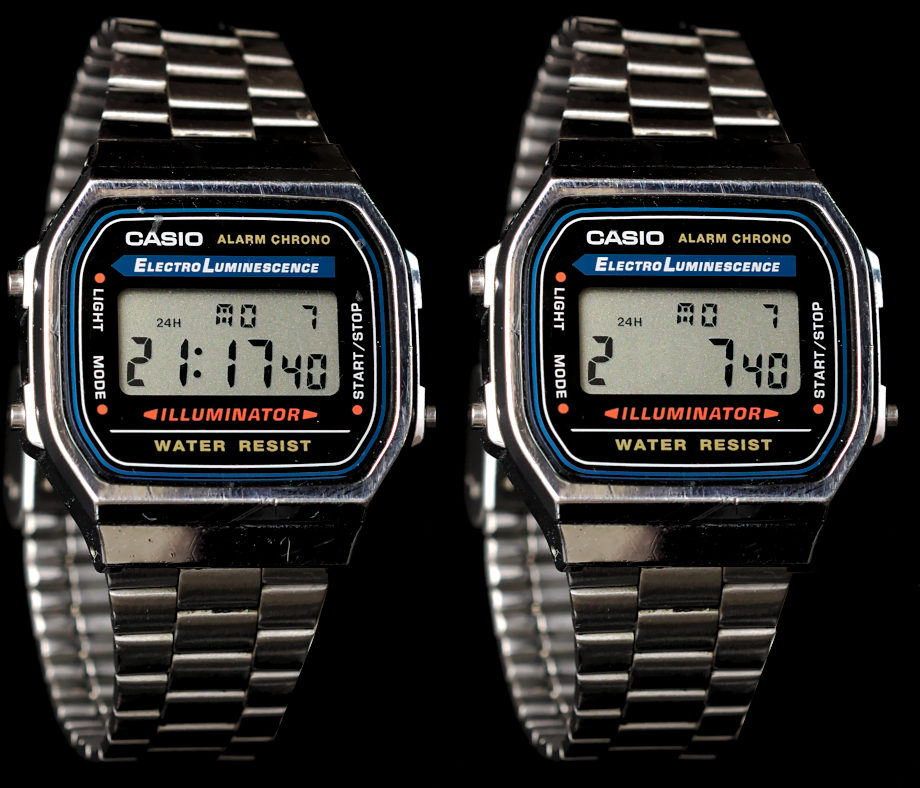
The photo on the left is the original, and the one on the right has been clone stamped.#
Is it magic? Nope! It just allows you to clone parts of the image onto another location. So it didn’t see under the digits; that’s impossible. Instead, the space between digits was carefully cloned over the digits. Less obviously (and more usefully), the smudge over the CASIO logo has been removed, and some scratches were removed on the band just below the face. Here’s how to do it in GIMP.
Load up your first image and choose the clone stamp tool (hover your mouse over all the tools in the toolbar until you find it; it kind of looks like a stamp). Your cursor will now be a dotted circle. Adjust the size by changing the
Sizeslider in the left-hand toolbar.Find the area you want to clone from and put the mouse over it. Press and hold the Ctrl key (it may be Command in macOS) and click once with the left mouse button to mark the clone-from area. In my example above, this was the empty space between digits.
Zoom in as much as you need (try Ctrl with
Mouse Wheel)Now move the mouse to where you want to clone to. Click with the left mouse button and paint over it carefully. You will see an indicator in the clone-from area moving in sync with your cursor. If/when you mess up, press Control-Z to undo.
Adjust the clone-from area a few times to make it look extra realistic (by repeating the second step).
Exercise
Try the clone stamp tool out on one of your photos. See if you can add or remove someone from a family portrait, or do something else fun. Note that you can load two photos at once and clone from one to the other.
Note
Speaking of panoramics, the hugin tool is a very powerful panoramic stitcher. Yes,
cell-phones often have this built it these days, but the feature is still pretty
useful in certain cases, and gives you as much or as little control as you’d like.
Image manipulations from the terminal#
Editing images from the command line may sound odd, but its utility comes up surprisingly often. You can modify images dynamically as part of a bigger system (like an interactive website that applies filters to images that people upload, for instance, hint hint), do something complex without a bunch of clicks, and apply the same modification to a whole set of images.
For example, if you set your camera out all night with an intervalometer and star-tracking camera mount to capture a new astrophotography time-lapse (or any other kind of time-lapse), you may want to crop them all the same, add some text, put a border around them, etc. Or maybe you have a bunch of still images from a simulation and you want to make them into a movie but need to shrink them all down first. A delightfully powerful suite of tools called ImageMagick can do all sorts of things like this.
OS |
Installation method |
|---|---|
Windows |
|
Linux |
|
macOS |
|
The simplest thing it’s good at is converting image formats. To convert a JPG to a
PNG, just run:
convert picture.jpg picture.png
You can convert them to pdf or bmp or many other things. If you have a bunch of
files, use mogrify instead of convert:
mogrify -format png *.jpg
What if you want to make a bunch of thumbnails for all the JPGs in a folder, while
rotating them 45° and making them black-and-white? We got you:
mkdir thumbnail
mogrify -path thumbnail -thumbnail 100x100 -rotate 45 -colorspace Gray *.jpg
Imagine having to do that on 100 images, or 1000, by hand!
Another fun one is the montage command (also part of ImageMagick). You give it some
images and it slaps them together in a montage of whatever shape and size you want. I had
some nice pictures of the August 2017 Eclipse, and made a montage with each
individual square being reduced to 960x960 pixels and with 10-pixel margins in each
direction with this:
montage IMG*.jpg -geometry 960x960+10+10 eclipse.jpg
Which resulted in this:
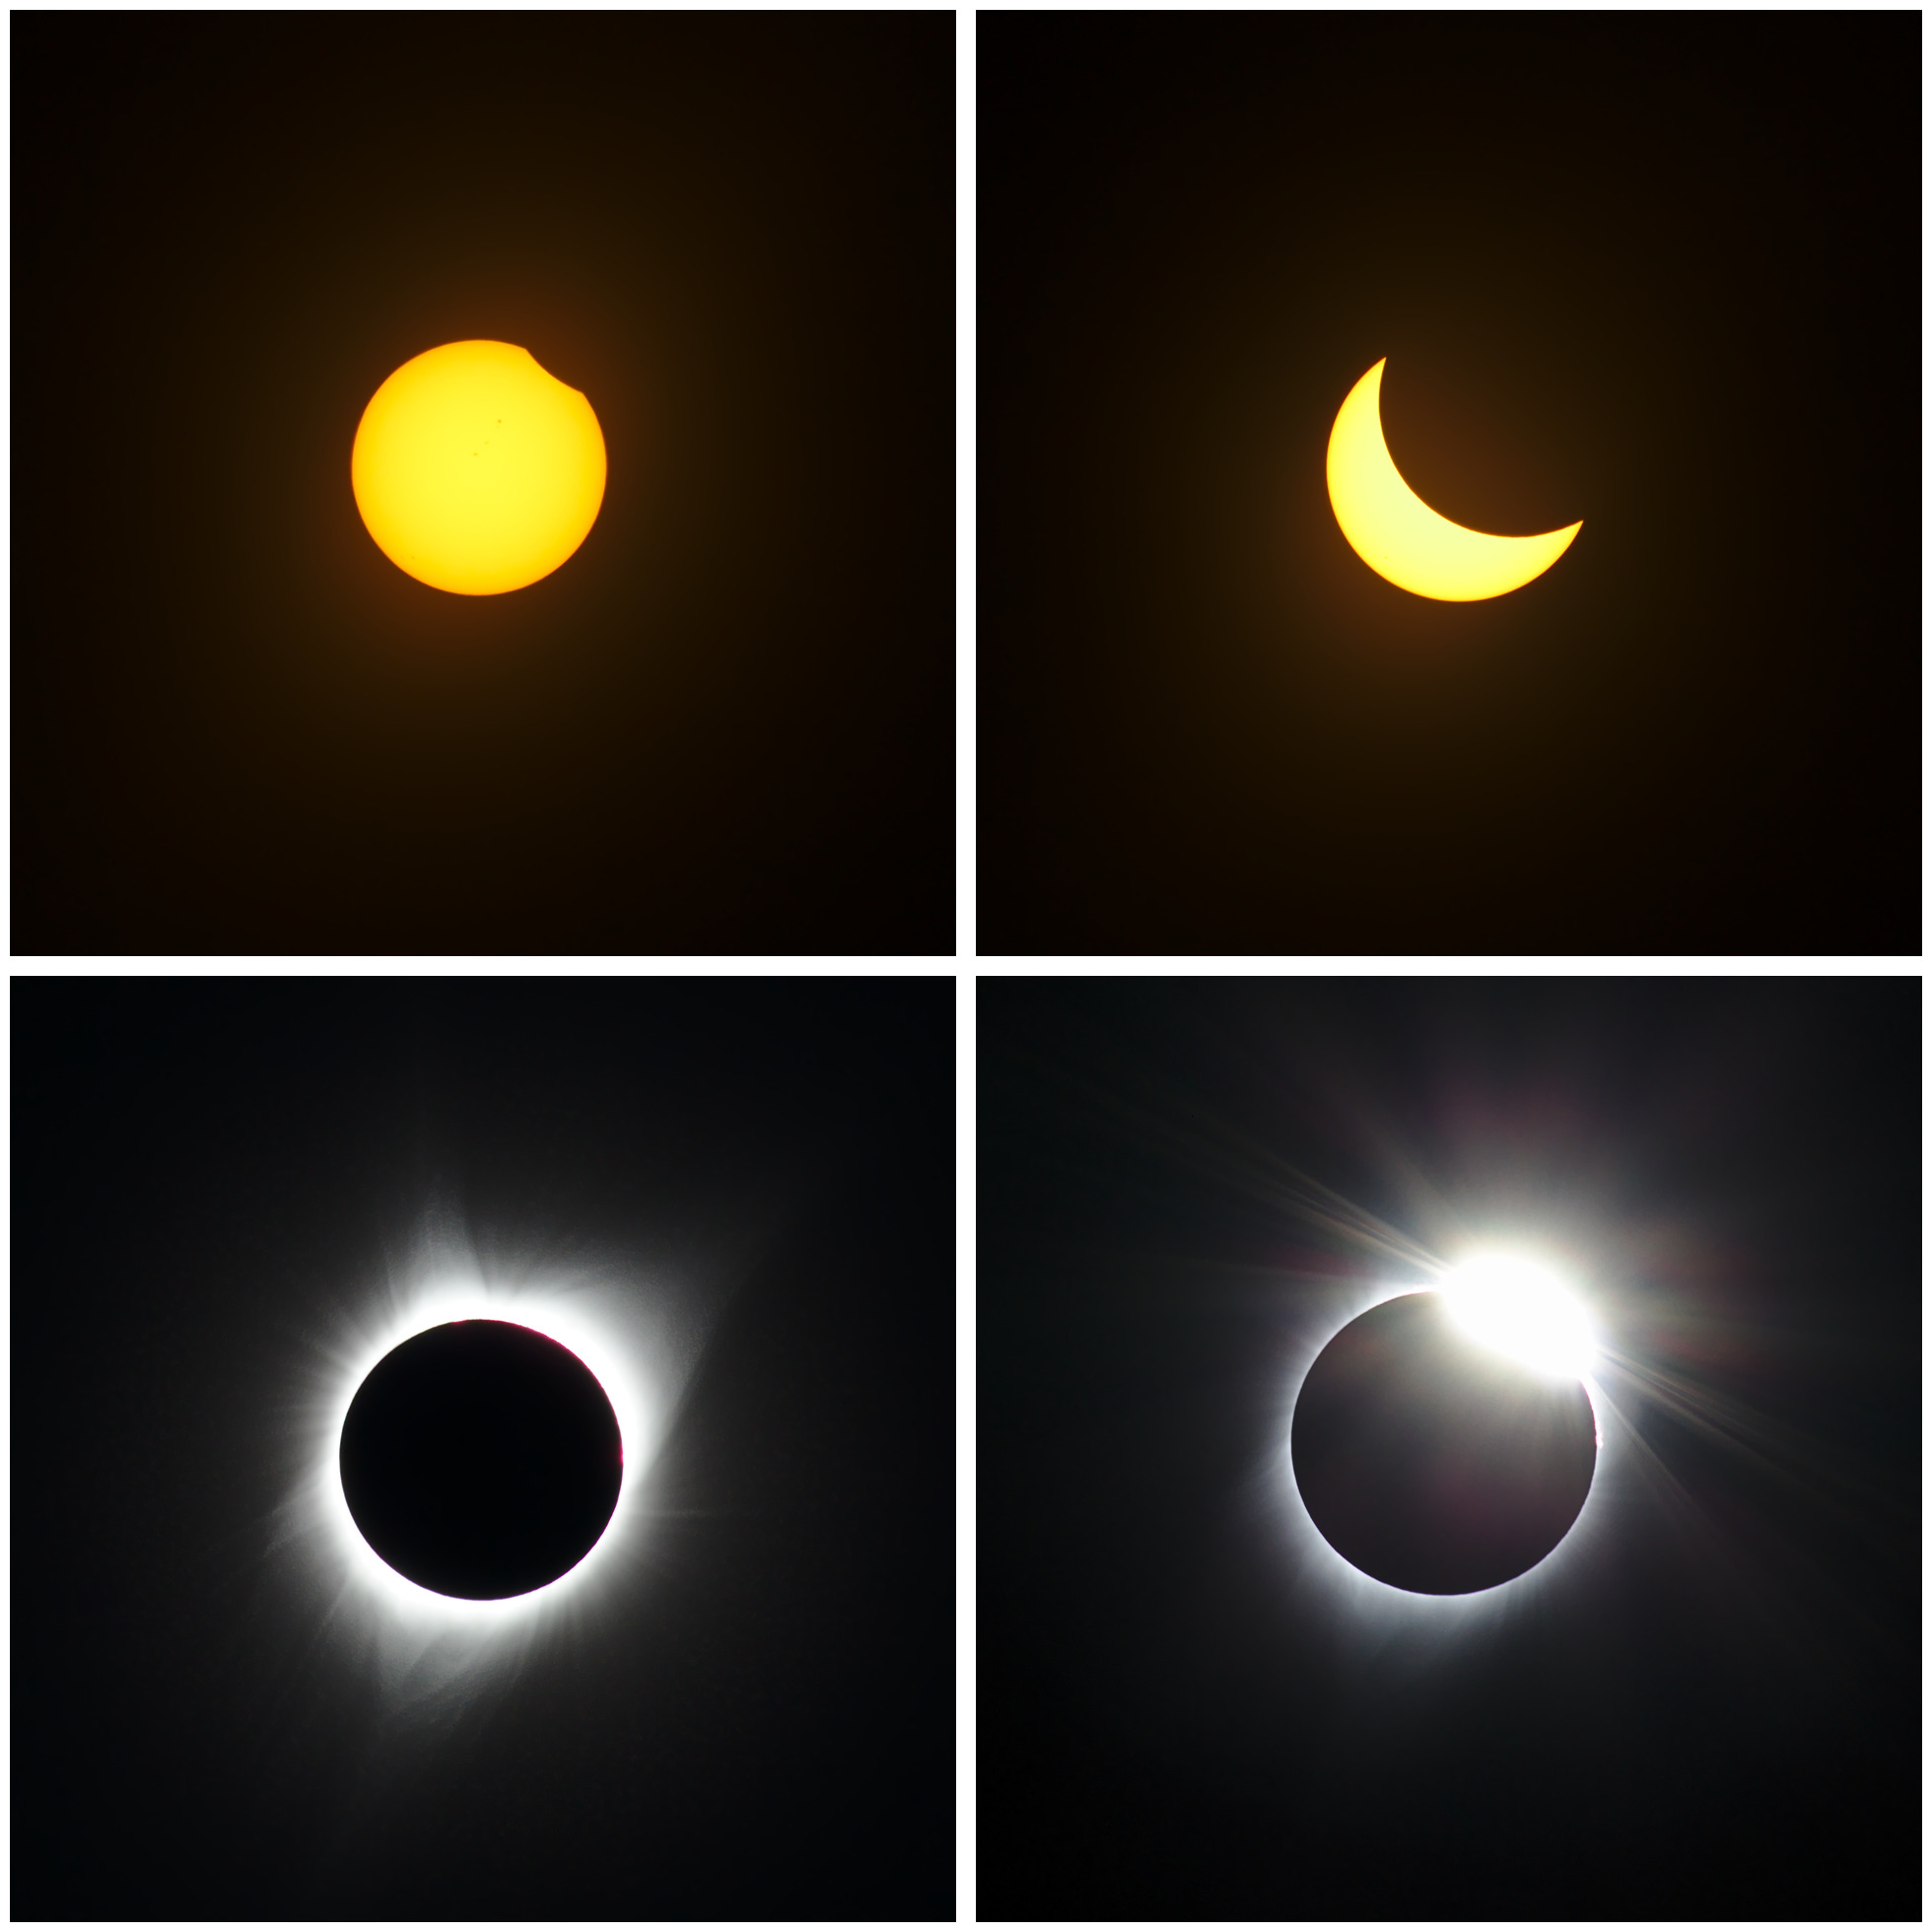
A beautiful Eclipse montage from Malheur National Forest, OR. By the way, I highly recommend seeing a total eclipse someday if you get the chance.#
You can add the -tile 4x1 option for a row montage and boost the margins a bit:
montage IMG*.jpg -geometry 960x960+20+20 -tile 4x1 eclipse-row.jpg
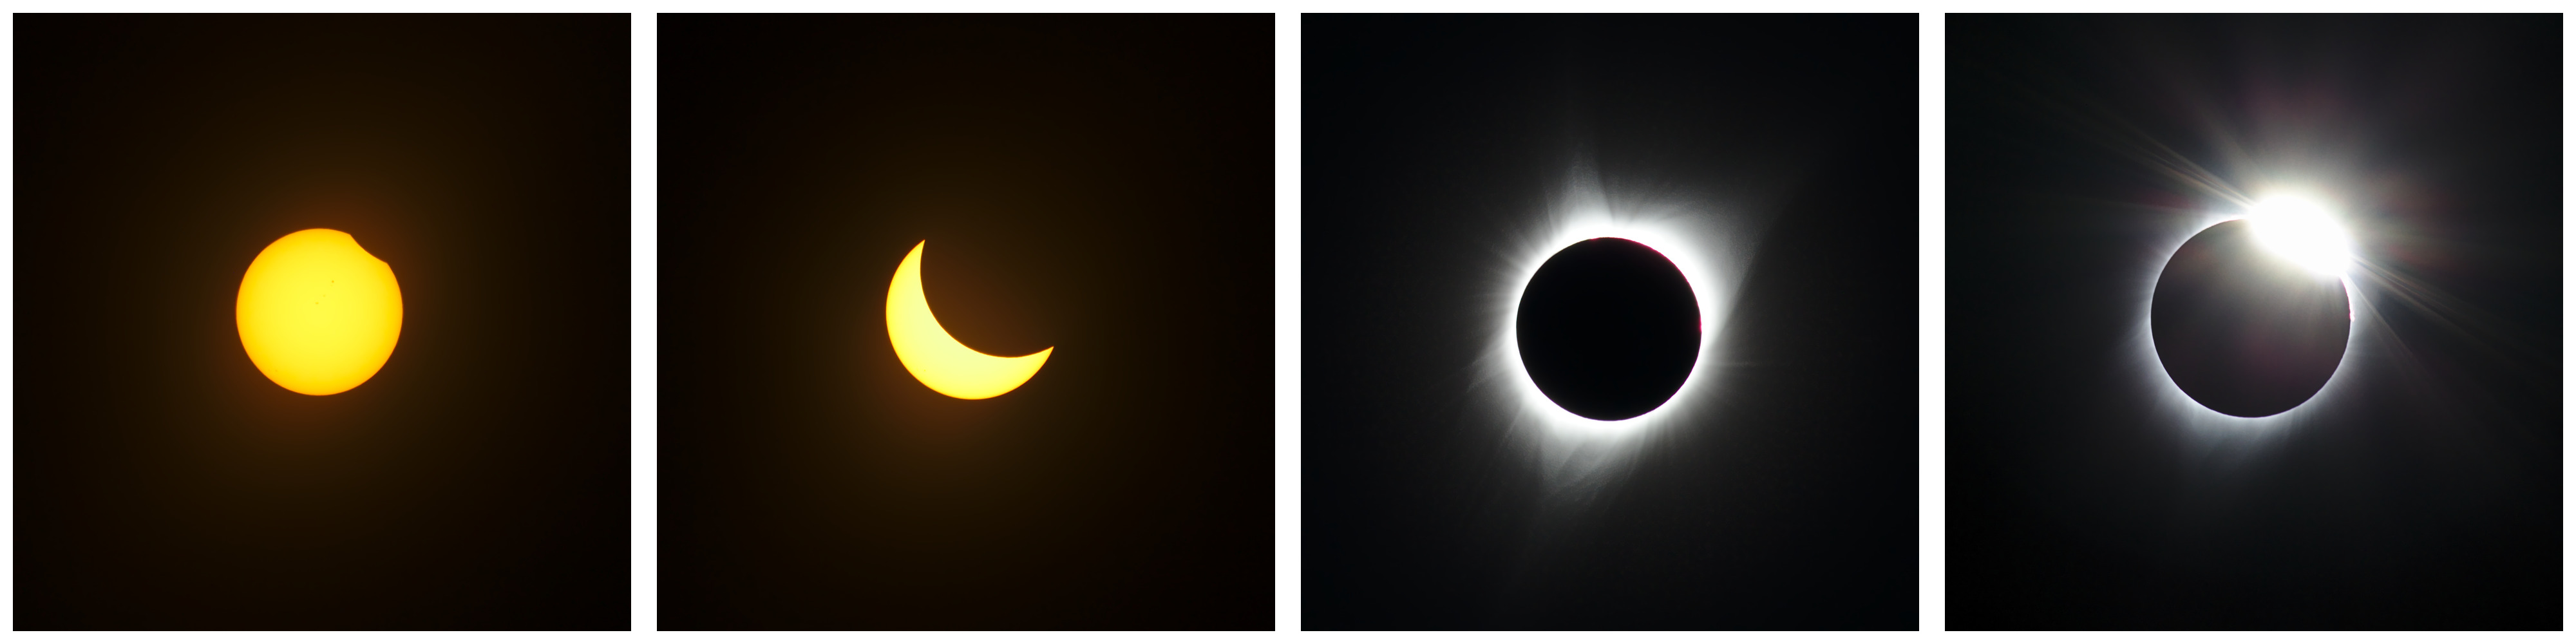
The same eclipse photos but montaged as a row.#
Exercise
Try it yourself with some images of your own but stack them vertically like a photo booth.
Sure you could do that kind of thing by clicking and dragging and perfecting this and that, but that’d take a really long time. This command line option is nearly instantaneous and can be repeated trivially on different images.
This utility is also excellent for adding Copyright © messages to images in bulk.
See hundreds of more examples at the Usage manual. Another must-see resource on this topic is Fred’s ImageMagick Scripts, which has hundreds of examples of kind of crazy and amazing things you can do with this tool. It’s not the prettiest presentation, nor the most discoverable, but if you click through some of those you’ll get a real taste of what this can do. The wheels of creation in your head are going to almost red-line.
Computer graphics#
Making graphics from scratch on a computer for fun and profit is another computer superpower. You can design your own logo, make signs for your neighbors, make diagrams for your research or web page, make your own comic strip, draw, trace, animate, and so on. It’s a whole wonderful world. This is another one of those areas where full 4-year+ college programs exist to teach people how to do it well. But that doesn’t mean you can’t get started right away. I’ve used these tools in many technical publications as well as for public communications.
Vector graphics#
Fundamentally, images can be represented on a computer in two ways:
- Bitmaps
Bitmaps are images made of an explicit list of which colored pixel is at each location in a grid. These are ideal for complex images and photographs. If you zoom too far in, they become pixelated and blurry. File types include
BMP,JPG,TIFF,PNG, etc.- Vector images
Vector images are made up of mathematical descriptions of shapes, such as “line from (x1,y1) to (x2,y2)”. These require fewer bits for simple line-art graphics, and you can zoom in on them infinitely without losing any sharpness. Files types include
svg,pdf, and others.
Note
Different bitmap formats have pros and cons too. JPG uses lossy compression
and can give small file sizes, but you have to be careful as the quality can degrade
significantly. PNG uses lossless compression, so quality remains high, but file sizes
can be larger.
GIMP deals with bitmaps. Other programs, such as Adobe Illustrator and Inkscape (open-source) deal with vector graphics. Inkscape is absolutely essential, so let’s get it.
OS |
Installation method |
|---|---|
Windows |
|
Linux |
|
macOS |
|
Here is a vector graphic made in Inkscape using the Rectangle tool, the Pen tool, and the Circle tool:
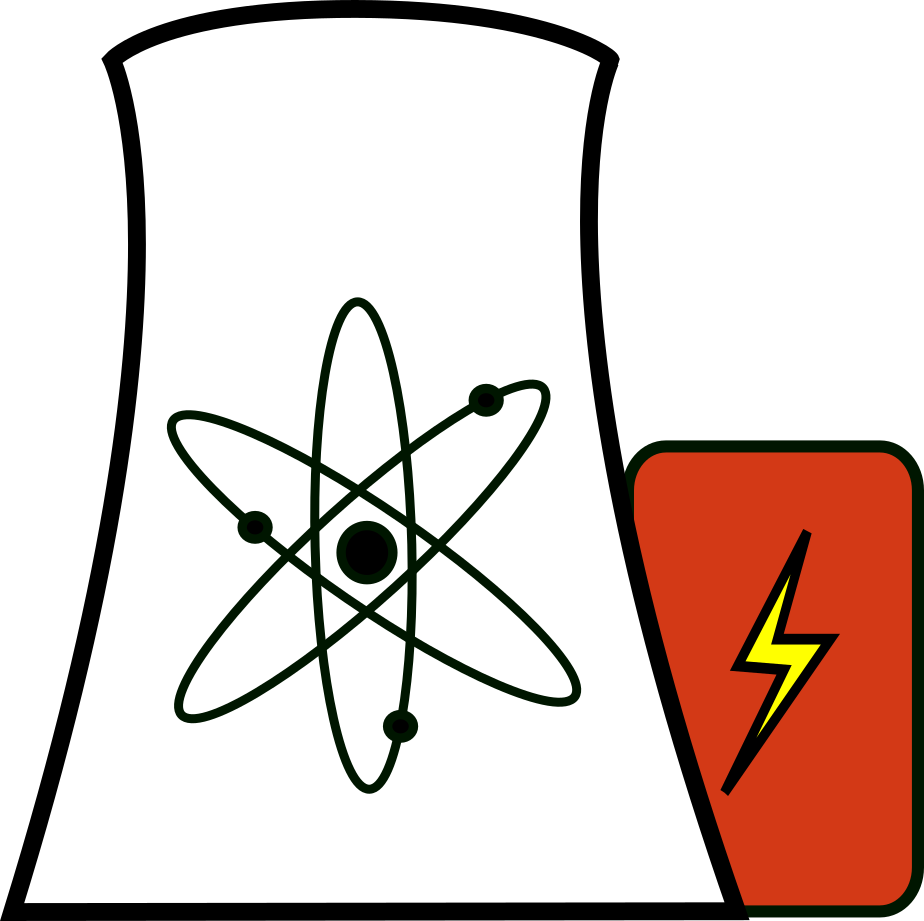
An icon of a nuclear reactor#
Let’s make a cool sailboat logo with it.
Step 1: Making a sail#
After opening Inkscape, hover the mouse over the icons along the left panel until the tooltip tells you that you’ve reached the
Draw Bézier curves and straight linestool. Click it.On the canvas, click once somewhere in the middle to start (we’re drawing a sail/triangle)
While holding Control but no mouse buttons, move the mouse to the right a bit and click again. Holding the key constrains you to a perfectly horizontal line.
Now move up and to the left until you’re over the first point. Click once again. If you hold Control here it will constrain you to one of a few particular angles.
Now go back to the starting point of this curve. It will turn into a red square (indicating that clicking will close and terminate the path). This time, click and hold the mouse button. While holding it, drag down and slightly to the right. This will make the previous line a bit curved, like a sail. Let go when you’re happy with it.
It should look like this:

My sail#
Step 2: More detail#
Repeat the sail process but draw a boat structure under it (be creative)
Click the sail (you have to hit one of the lines because the inside is currently empty). Now click one of the colors from the bottom (it scrolls) to color it how you like.
Do the same with the boat.
Click the Text tool on the left (big letter
A) and draw a text box with it under the sailboat. Write “SAIL LIFE” or something else in it.Click the circle tool and click/drag to make a circle around the boat. Hold Control to constrain it to a perfect circle.
If it’s solid, click the
Xin the far left of the color bar to make it clear/empty.Find the
Fill and Strokedialog (on the right-hand side). It has three tabs in it:Fill,Stroke paint, andStroke style. In theStroke styletab, increase theWidth. You’ll see the circle getting larger.Choose a stroke color from the
Stroke paintsection to color it, (or Shift-Click a color in the color selector at the bottom of the screen).Save it as an SVG (native vector format).
Export it as a
pngby going to theExport PNG Imageoption (on the right), choosing a file name in theExport Asfield and then pressingExport.
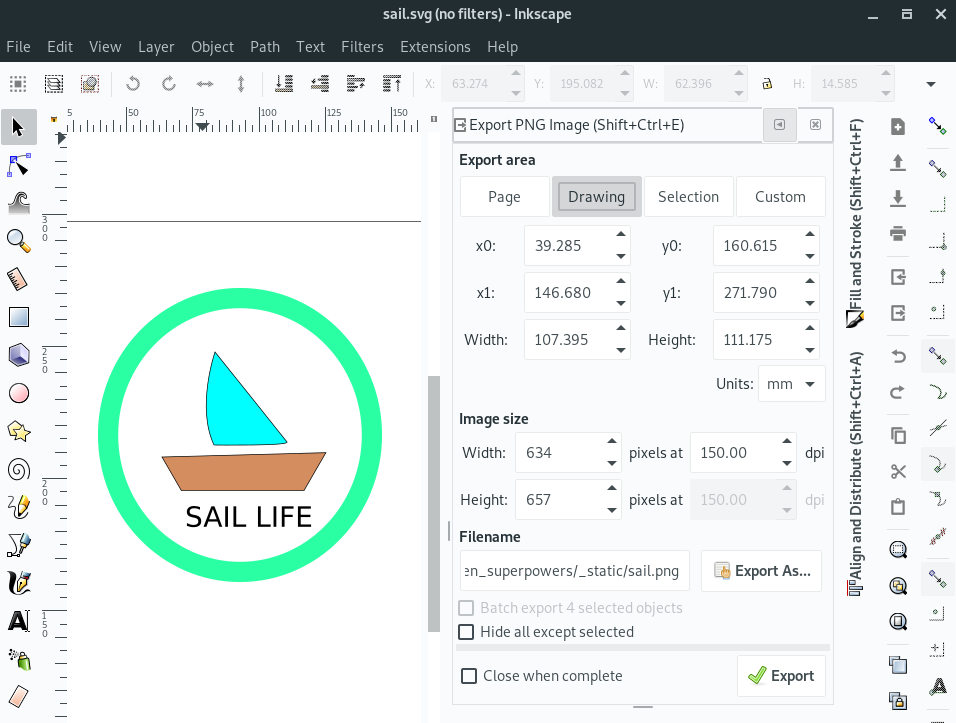
My sailboat logo in Inkscape#
This just barely scratches the surface of this tool and others like it, so explore around and, as usual, check out more serious tutorials for the real magic if this strikes your interest. I suggest looking into the bitmap tracing capability for your next superpower (it converts bitmap graphics into vector graphics).
Another serious open-source graphics tool out there is Krita, known mostly for concept art, illustrations, and comics. A lot of people use digital pen hardware with this program like a Wacom tablet.
For current or aspiring cartoonists, a truly professional tool used by Studio Ghibli and
others called OpenToonz was made open-source
in 2016. It has been used in the production of Futurama, Anastasia, and Balto. An older
version is currently available in chocolatey for Windows. There is a snap for
Ubuntu Linux. Mac users can get it directly from the link above.
Color lifehack#
One neat way to get a bunch of colors that look borderline good together is to choose them in the Hue-Saturation-Lightness (HSL) space instead of the more typical Red-Green-Blue (RGB) space. Pick one color anywhere in HSL and then choose all others by adjusting the Hue only (keeping saturation and lightness constant). These always end up looking like they belong together. All graphics programs allow you to choose colors in HSL these days. Of course, color wheels can also help you figure out complementary colors.
Here’s what a few boxes made with this trick in Inkscape look like:

Some nice colors that go together with the same S and L values. (Sorry B&W readers, this also looks better when viewed in color)#
Websites like https://coolors.co/ can do this too.
3-D Modeling with Blender#
Blender is a 3-D modeling program. It is considered one of the best open-source programs ever made. With it, you can create objects for 3-D printing, animated characters for games, and even entire animated scenes with physics modeling such as a swinging ball-and-chain smashing into a pile of little boxes that go flying all over the place. You can get it the usual way:
OS |
Installation method |
|---|---|
Windows |
|
Linux |
|
macOS |
|
It’s a professional-grade program which could make one’s entire career. With its graphical nature, the best way to get started is to watch the Blender Fundamentals YouTube playlist, which at press time has 41 introductory video walkthroughs. Once you get used to the mouse and keyboard controls and see how to rapidly sculpt the progeny of your imagination into being, the world will be at your fingertips!
Once a 3-D object is built, the process of rendering it applies textures and lighting to turn it into a realistic-looking object. The technology of ray-tracing allows renders to take on a photorealistic quality, but requires serious computation. This method creates computer simulations of rays (kind of like virtual photons), transporting them through the scene. As they experience reflection, refraction, and blockage, they get recorded in a virtual camera looking at the scene [1]. In effect, this allows the creation of scenes that are indiscernible from real life. One of my favorite examples of this method was created way back in 2006 using another great tool called POV-Ray (not Blender). Here it is:

A ray-traced render of some glasses created by Gilles Tran with POV-Ray 3.6. You can find the POV-Ray code for this, remove a glass, and then re-render it to convince yourself that it’s totally computer-generated.#
Computer-Aided Design (CAD)#
While Blender can be used to design physical objects, it’s more specialized for making visual scenes intended to be viewed on a screen. The field of Computer-aided Design (CAD) covers programs that are specialized for making real objects like machine parts, structures, skyscrapers, sculptures, and so on. Many mechanical and structural engineers live and breathe by a commercial tool called SolidWorks. It is extremely expensive, but when you’re making a $30M part, it’s worth it. This class of tool includes sophisticated physics and material modeling so that as you adjust the shape and composition of your object you can also subject it to various conditions (like wind, temperature gradients, earthquakes) and make sure it survives or otherwise performs as required. You can also make sure the part is fabricable with the process you plan to build it with. Welcome to mechanical and civil/structural engineering.
For around the home, studio, and small shop, you can get started learning concepts of CAD and designing real things with an open-source parametric CAD system called FreeCAD. It’s not as sophisticated as the commercial tools, but it can still do an incredible amount. Many CAD experts have given it mediocre-to-poor reviews over the years but a growing excitement surrounds its recent releases and potential. Try it out right now via your package manager:
OS |
Installation method |
|---|---|
Windows |
|
Linux |
|
macOS |
|
As with most valuable and powerful skills, CAD is non-trivial to pick up, requiring dedication to achieve expertise.
Notably, a Building Information Modeling (BIM) Workbench plug-in to FreeCAD has been under very active development and is something to watch for designing buildings more seriously. It could come in handy for that addition to your home or that new shed you’ve been thinking about.
The wide availability of FreeCAD combined with its scripting and parametric capabilities (meaning the when you adjust the height of a part, all interrelated parts will update automatically to fit) make it an intriguing candidate for distributed open-source hardware and structural projects, should such a thing ever be conceived. I envision a glorious future full of this kind of collaboration, such as in open-source international power plant design.
OpenSCAD is another excellent and available CAD tool that could be interesting to compare and contrast with FreeCAD as you’re starting out. Yet another is SALOME, which comes out of the French nuclear industry, where it’s used to make CAD models as well as to interface between many different numerical physics solvers.
Autodesk’s commercial Fusion 360 has a free license for hobbyists and other non-professionals. This offers a pathway to learn a powerful commercial tool at low initial cost. Philosophically, the availability of this likely and unfortunately pulled some focus away from the development of the open-source tools.
Note
Speaking of science and engineering, OpenFOAM is another stunning multi-platform open-source system made to perform computational fluid dynamics (CFD) calculations. If you’ve ever seen those animations showing high-color super-detailed airflow over an airplane wing or car, that’s what CFD does. We use CFD all the time in the nuclear industry.
The digital darkroom#
In the olden days, photography (”writing with light”) had two artistic phases: going out into the field and making beautiful compositions on film and then deciding how to expose and crop them to a print in the darkroom. Digital photography has been revolutionary, largely eliminating the darkroom step for most of us.
It’s worth noting, however, that we do have digital darkrooms now in each of our computers, and the opportunities for artistic expression within are staggering. While anyone can take beautiful snapshots with their phone, those who are interested can go deeper and unlock the really fun and rewarding world of digital darkrooming.
The RAW advantage#
When you take a digital picture, light comes through a lens and excites a bunch of little electric light buckets in a grid called a digital sensor. Each light bucket records how bright either the reds, greens, or blues are in each point on the grid (different colored filters are overlayed on the grid in a pattern, often as a Bayer filter). The size of the grid determines the resolution of the image you get, and that is often proportional to sharpness. Thus, more is considered better. You’ve heard these measured in megapixels (“millions of picture elements”). A 25-megapixel image may record one 14-bit number per pixel, so the total size of the file would be:
That’s a lot of megabytes (MB). But if you look at the size of a picture from your phone, it’s closer to 10 MB. BUT HOW? The answer is that the bits from the sensor get sent to a microprocessor in the camera that compresses them mathematically to smaller sizes using the JPEG algorithm. Conceptually, if an image has 500 zeros in a row, the RAW file has 500 repeated numbers whereas a compressed file just has a few bits that say: “500 zeros in a row”. The compression used is lossy, meaning information is lost when you compress a RAW image to a JPG. Worse still, JPEG images only have 8-bits of information per pixel instead of the full 12- or 14-bits your camera collected. More bits means more possible brightness values for each individual pixel.
To make a long story short, professional photographers shoot in RAW mode to skip this compression because they will process the image in their computer’s digital darkroom. When you work in RAW you can do incredible things, like pull details out of underexposed shadows, change the white balance, reconstruct overexposed highlights, denoise, and much more. If you didn’t have the exposure settings quite right on an incredible shot, RAW is very forgiving and will help you get the print just right.
If you want to try out the digital darkroom, set your camera to save files in RAW format (note that you won’t be able to store as many on one memory card, but I’m not even worried because you can still fit a lot of RAW files on a 128 GB card).
Here is an example. First, an image as taken right out of the camera:

And the same photo after a bit of time in the digital darkroom:

Look at all that detail that was effectively black in the first one that was brought out!
How to get started in the digital darkroom#
Most professional photographers use the proprietary and expensive programs from Adobe called Lightroom and Photoshop as their digital darkroom. These are considered the best and do everything you’ll need. Open-source alternatives can get you 98% of the way there, and you can start with them right now. In particular, darktable is an absolutely phenomenal RAW digital darkroom program that was until recently only available in Linux. Here’s how to get it:
OS |
Installation method |
|---|---|
Windows |
|
Linux |
|
macOS |
|
Darktable is a powerful program that takes some orientation to get started with. Fortunately, well-produced tutorial videos on YouTube will walk you through various development workflows step by step. Harry Durgin is my favorite. He talks you through exactly what he’s doing and why, while crickets chip in the background at his Hawai’i-based studio. His darktable edit playlist at press time has 42 wonderful videos. This is the best way to see what the various tools are capable of doing.
The basic workflow is roughly as follows:
Import photos into the light table view and rank them 1-5 by pressing the 1-5 buttons on your keyboard.
Choose your favorite and double-click it to enter the dark room view where you’ll edit a single photo.
- Try out a few basic plug-ins to get started, including:
Denoise (profiled) — This uses data generated by other users who have your same camera model to remove digital noise, smoothing our your picture, especially in low-light areas.
Lens correction — If your lens is in the database, this applies corrections to geometric distortions, chromatic aberrations, and vignetting.
Crop and rotate — Adjusts the crop of the photo to best tell the desired story. Remember the rule of thirds and other composition guidelines. Note that you can right-click/drag in this view and trace along a line that you intend to be either vertical or horizontal and it will rotate the photo to make it so.
Tone curve — Adjusts the exposure to get the lighting just right. You can make the curve steeper to get more contrast.
Shadows and highlights — Brings the brights down and the shadows up, evening out the exposure a bit.
Color correction — Changes the overall colors in the image.
Levels — Brings the black point up so the blacks are really black.
Press the
Lkey to go back to the light table. Now clickexport selectednear the bottom right to write out the final image as a developed Instagram-ready JPG.If desired, open the image in GIMP for final modifications and touch-ups.
Repeat for however many photos you like.
If you have a few plug-ins you always activate, you can have them automatically turn on.
Darktable comes with some extremely powerful features. One impressive one is parametric masks, which allow you to apply various operations only to certain sections of the photo as defined by ranges of brightness or color. You can combine these with drawn masks to fine-tune the look you want. So if you want to brighten or adjust the reds, but not the greens, you have full elaborate control of doing so. The artistic flexibility will give you many new ways to express yourself. You really have to watch some of Harry’s tutorial videos to see this in action.
Making podcasts, music, and sound effects#
There’s this great track on Daft Punk’s Random Access Memories where Italian electronic dance music pioneer, Giorgio, explains how he got started making music with synthesizers. At the end of his monologue there’s a perfect pause and then these epic synth arpeggios hit and it’s just amazing. In Giorgio’s pioneering days, the synthesizers were all analog circuits, but way back in the 1980s, digital synthesizers became widespread. Today your own personal computer can churn out synth beats and sounds like you wouldn’t believe.
The excitement of sound#
In about 1992 Sound Cards were an exciting accessory you could add to home computers. I vividly remember our family getting a Sound Blaster Pro card and installing it in our DOS-powered CompuAdd computer. At the time it seemed that the possibilities were endless. This hardware to synthesize sound came with demo programs including [2] :
A talking parrot that would repeat anything you said in the microphone in a high pitch.
A talking psychiatrist program (Dr. SBAITSO) who would psychoanalyze you in a robot voice.
An organ you could play that would auto-accompany you as you pressed buttons.
A sound recording program where you could pitch-shift, reverse, and otherwise edit things you said into the microphone.
This was really exciting, fun, and inspiring. Even though computers making sound seems a bit mundane at first glance, it still can be awesome. Tools and processes have just gotten better with time. Most people don’t look at their laptop and consider the possibilities as a sound studio. Maybe you will from now on.
Recording and processing audio samples#
Recording and digitizing real sounds through a microphone is fundamental to audio on computers. So let’s try it out. Audacity is a popular and widely-available audio program that can do this well. Here’s how to get it:
OS |
Installation method |
|---|---|
Windows |
|
Linux |
|
macOS |
|
Fire it up and press the big red circle Record button and just speak your name. You should see some audio waveforms showing up. Then press stop. (If you just flatline then you may have to hunt for your Sound Settings and select your microphone from the input section; just use a web search if you have trouble). You will see something similar to this:
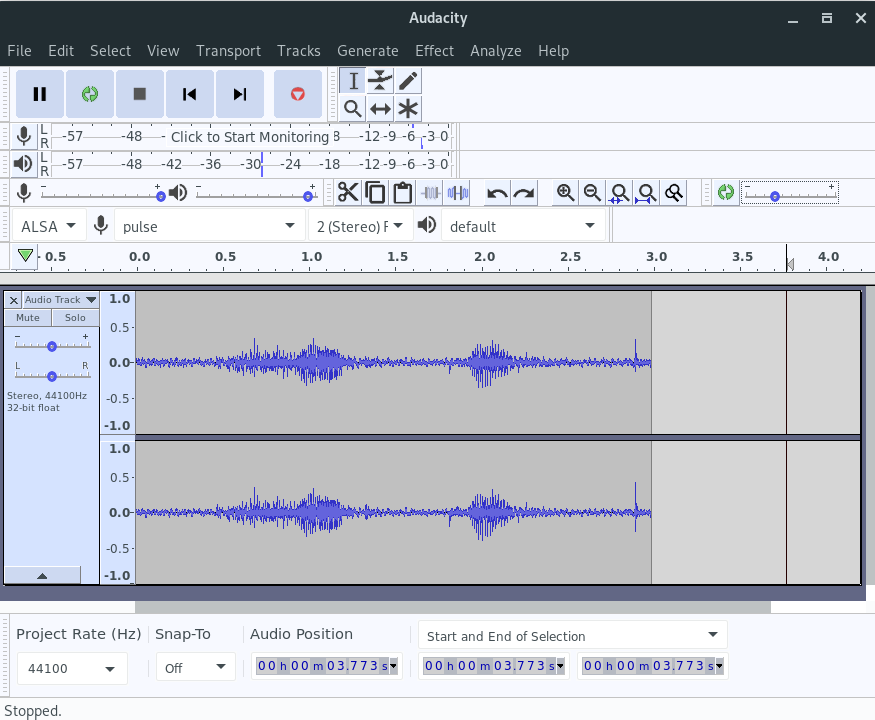
A screenshot of Audacity with waveform after recording a sample.#
Try playing it back (by pressing the green Play button). Now for the fun part. Select
the whole waveform by clicking/dragging over it. In the menu, select Effect → Reverse.
Play it back again and you’ll hear your name reversed. Reverse it again to get back to
normal.
Exercise
Now that you have heard your name spoken backwards, try recording yourself mimicking how it sounds backwards. Reverse it with the computer to see how you did. This is a decidedly fun party trick.
It’s fun to try other effects as well, especially the Change Pitch one, creating
laughs for days. As you dig into computer audio you’ll also find ways to do live
processing of what you say in the mic or play with an instrument. Beyond the hilarity of
live pitch-shifting, your computer can be an entire post-recording or live effects system.
Recording for a podcast or radio show#
If you want to make a podcast or radio show, Audacity is enough to get you started. You can chop up the recording, crop out parts you don’t want, and add in a soundtrack. You can even remove background noise, which has an excellent effect on the listening quality. To do so you first have to profile the room tone by taking a recording of just it. Try this:
Start a new recording in Audacity.
For the first 10 seconds just sit there in silence, collecting ambient noise.
Now say something useful (i.e. for your podcast) for at least another 10 seconds.
In the waveform editor, select the portion that’s just noise.
Go to
Effect → Noise Reductionand clickGet Noise Profile.Now select the whole recording and go to
Effect → Noise Reductionagain.Click
Previewto see how it will do and adjust the sliders if it doesn’t yet meet your fancy.Click OK and behold your noise-free high-quality audio recording. You’ll note that the waveform image shows much less noise in the gaps between your words.
The Compressor effect is also useful along these lines. It makes the volume more
consistent so your listeners don’t have to constantly futz with the volume level to hear
you.
When you have the recording just right, choose File → Export and save the final
result.
For complex projects with many tracks, a Digital Audio Workstation (DAW) such as Ardour becomes useful.
Synthesizers and music#
There are lots of pieces involved in producing music on computers, so let’s go through a few:
Component |
Purpose |
|---|---|
Samples |
Bring real-world sound into the computer by recording voices, acoustic instruments, sound effects, etc. |
Synthesizer |
Generates sound waves digitally based on keyboard (as in piano keyboard) input or programming |
Drum machine |
Special synthesizer that makes drum beats in loops |
Digital Audio Workstation (DAW) |
Records multiple tracks from synthesizers and/or microphones and allows you to move them around and modify them with various plug-ins to get them sounding just right. Often fully integrated with syths, drums, and plugins |
VST Plug-ins |
Add-ons that you can hook to your DAW to modify the sound of an instrument |
VSTi Plug-ins |
Synthesizer instruments that come packaged in the VST standard (making them easy to plug into any DAW that supports the VST standard) |
Professional musicians invariably use professional audio software, and for good reason; it’s quite polished. Ableton is only a few hundred dollars to get started with and, most musicians will tell you that it’s hard to compete with.
That said, there’s no harm in trying out the open-source offerings. Starting with
drums, Hydrogen is multi-platform enough that we can all try it out.
It’s not in the Windows or macOS package managers, so download it from here. You can just start clicking where you want the
various instruments to hit. Try matching my beat here (I changed the RES from 8 to 16
so I could put in 16th notes):
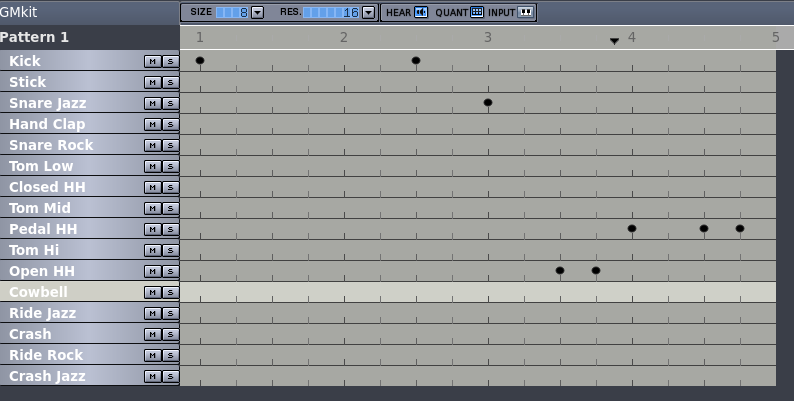
Screenshot of a cool drum beat I whipped up in Hydrogen. Try it to hear it.#
Press the little play/pause button to hear it. You can build dozens or hundreds of measures like this and use the grid above to schedule how they evolve with time. For instance, you can do 4 repeats of an introductory rhythm and then start activating more layers that build upon it. Fire up Audacity to record and plug in a microphone so you can make your first rap.
Exercise
Record your first rap using Hydrogen and Audacity.
We’ll need to use a synth to put down a melody and bass line. Software synthesizers can be explored with a computer keyboard or even a mouse, but musicians will find this inadequate and want an older kind of keyboard: that of a piano. MIDI keyboards are perfect for this. They have a piano keyboard but don’t make any sound on their own; they’re just a musical input device for your computer. They often include pressure-sensitive pads you can tap on for drums or other controls, a bunch of sliders, and dial controls. These can all be tied to whatever you want in the software synth. For instance, you can hook one of the sliders to something that changes some quality of the waveform and then control it during recording or a live show. There are specific MIDI ports on some sound cards, but many modern MIDI keyboards just use USB.
There are not many multi-platform open-source synthesizer systems/DAWs, but LMMS has emerged as a high-quality, easy-to-get-started, and powerful system.
OS |
Installation method |
|---|---|
Windows |
|
Linux |
|
macOS |
|
It’s the kind of program that will have you playing the Mission Impossible theme in exciting glory within a half hour (it’s in 5/4 time, FYI). The documentation is good, and this tutorial will have you rocking out. Try it out, it will absolutely bring a smile to your face and get your creative, expressive wheels turning into overdrive.
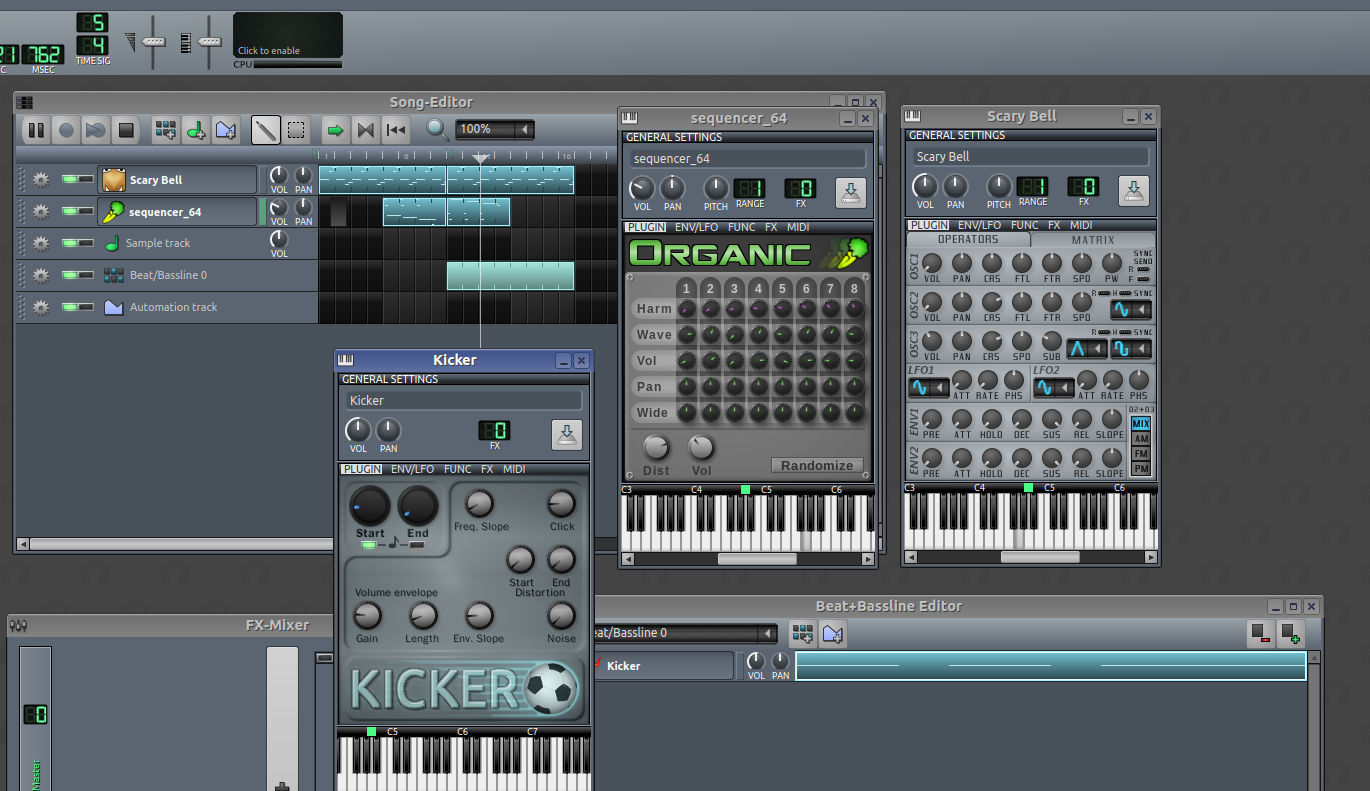
A screenshot from making the Mission Impossible theme in LMMS#
DJing a party or show#
DJing a good party or show requires a lot of work to set the mood and shift it through emotional highs and lows all while keeping a coherent, continuous story or pace going. To produce such a show requires either two turntables that you swap between, or a laptop. If you go the laptop route, you will find some excellent software tools that can get you up and MCing in no time.
We’ll highlight the cross-platform open source Mixxx program here. It’s available in your package manager and is designed to help you get started even if you’ve never DJed before.
OS |
Installation method |
|---|---|
Windows |
|
Linux |
|
macOS |
|
This program will scan your music library and present you with the list of songs. You can drag one to the player on the left and another to the player on the right. There’s a left/right cross-fader control in the middle that will let you switch volume from one side to the other gradually. Here’s the idea:
Load a song in the left player and drag the cross-fader all the way to the left. Press the play button under the
CUEicon. You should hear it start playing, and the waveform on top will start moving.Try clicking/dragging the moving waveform back and forth jerkily a little (trust me).
Load up the next song in the right player and drag it to where you want it to start from. If you want, you can rig this up with dual soundcards so you can preview what you’ll play next in your headphones while still playing over the main room system (this is why DJs always are holding up headphones to their ears and bobbing their heads).
Adjust the tempo if needed, or press
SYNCto match the same tempo as the currently playing song.Press the play button on the right to get it rolling (it’s still silent due to the cross-fader).
When the time is right, drag the cross-fader right until the song on the right is the only one heard.
Repeat this process, but this time going from right to left.
Do not stop until either the world ends or the sun comes up.
You can do this live or use something like Audacity to record your show in advance if you’re putting out a mash-up album or whatever.
It looks like this:
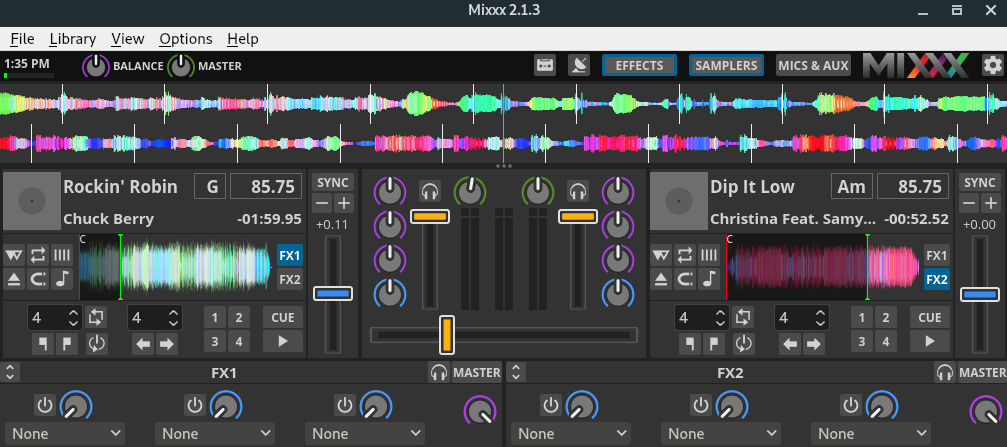
A screenshot of Mixxx playing a fairly eclectic show#
Movies#
The movie industry is large and lucrative. Software is absolutely key as the green screen has taken over. As such, professional software tools in all elements of movie production are in fierce competition. All the best tools are commercial, so if you want to go into professional movie production, you will likely need to learn tools like Adobe Premiere, DaVinci Resolve, Lightworks, Autodesk Maya, Flowbox, ZBrush, etc.
That said, a few accessible superpower tools do exist for people outside the movie production industry.
Format conversion, trimming, and time-lapses#
The most universal command-line video tool is called ffmpeg. It’s useful for recording, converting, and streaming video (and audio).
OS |
Installation method |
|---|---|
Windows |
|
Linux |
|
macOS |
|
ffmpeg can slice and dice videos.
For example, if you have a long video (input.mp4) that you only want a two-minute clip
from (between 12:21 and 14:21, for example), you can use a command along the lines
of:
ffmpeg -ss 00:12:21 -t 00:14:21 -i input.mp4 -acodec copy \
    -vcodec copy -async 1 section.mp4
This will create a new video called section.mp4.
Note
If the video doesn’t end up cutting right, then there probably is no keyframe
at the time you cut it. To get around this you have to re-encode the video by omitting
the acodec and vcodec option, which will take some processing time.
To convert from one video format to another, you specify the video codec (-c:v) and/or
audio codec (-c:a). The commands are like:
ffmpeg -i movie.avi -c:v libx264 -preset ultrafast movie.mp4
ffmpeg can make time-lapse videos from image sequences. This is useful in research
environments (e.g. stitching together stills from a simulation) or in hobby or art spaces
just the same (e.g. combining a year’s worth of security camera stills into a
year-in-review project). The input options to ffmpeg are very versatile, but also
complex and frequently changing. Thus, it’s best to use web searches to find the best
command for what you want to do. For instance, if you search something like ffmpeg
stitch photos into time-lapse you may find something like:
ffmpeg -framerate 9 -pattern_type glob -i 'ice-move/shed-*.jpg' \
       -vcodec libx264 -crf 15 -filter "minterpolate='fps=30':'mi_mode=blend'"\
       -pix_fmt yuv420p ice-move.mp4
This will take all files called shed-[anything].jpg in the ice-move folder and combine
them into a new time-lapse movie called ice-move.mp4. This actually does interpolation
between frames, giving a really smooth-looking time-lapse.
You can even make high-quality animated GIFs for posting on the internet. With ffmpeg,
web searches and StackOverflow are your friends. All the options are described in
elaborate detail at https://ffmpeg.org/ffmpeg.html.
Video editing#
When you’re going to produce a movie from video you shot around town for whatever reason, you need graphical video editing software to arrange the clips how you want them, to add smooth transitions (fade, blur, etc.), to add rolling credits at the end, and to insert a soundtrack.
There really is no universal standard multi-platform video editing software. Each OS has its favorites. OpenShot is one open source option available on all platforms that is well-worth trying out. It’s user-friendly, and has most of the features you’ll want for video editing. It’s a bit slow, and I got frustrated with how frequently it crashed a few years back, but they’ve been working hard on stability since then. There’s absolutely a strong potential.
OS |
Installation method |
|---|---|
Windows |
|
Linux |
|
macOS |
Go to https://www.openshot.org/download/ and run the installer |
If you’re on Linux, KdenLive is also worth a look. It seems significantly faster. Blender actually has full-featured video editing capabilities as well, and is quite stable. The user interface may take extra work and training to get used to, but it may actually be the most stable multi-platform experience. Tutorial playlists like Mikeycal Meyers’ can get you operational fairly quickly.
Other than that, Windows Movie Maker on Windows and iMovie on Mac are very polished and usable. The real point is to get that phone camera out and try to make little movie productions. As much as we have video cameras in our pockets these days, it’s a bit uncommon to see someone put a film together. You have all you need at your fingertips already, so making a movie could be a fun activity for some rainy day. At least personally, I really cherish the old home videos I have from my childhood a lot more than the photos.
Making games#
In the 1990s I was hoping to learn how to make video games. I got a book about doing it in
the C programming language and it started with putting the graphics card into VGA mode
13h and writing pixels to the double-buffer one at a time. In other words, it was
a bit inaccessible for me at the time, and I never got very far.
With the advent of widely available game engines, things have changed dramatically. These are software systems that make games. They come with so many features that you can make simple games without writing any code whatsoever. Of course, for advanced games and logic, code will eventually be needed.
Unity3D is such a game engine that makes games for phones, computers, and game consoles. A free beginner version lets you try it out (though you do have to pay once your games start making over $100k on app stores). The free version is more than sufficient to start going through some of the training material. The tutorials will walk you through the basics and whet your appetite so you can see if you want to keep going with it or not.
This high-level game programming is a fun way to start. That said, you’ll still gain much in going under the hood to learn what’s really going on. The world will always need low-level developers to keep the lights on for the rest of us. For that, you’ll need the chapter on Programming.
From cropping photos to DJing parties, I hope you’ve enjoyed this taste of what kind of creative things you can do on your computer. We’ll continue along these lines in the next chapter as we learn about getting the written word out there.
Footnotes